Pool Mining Electronero w/ xmr-stak
Last revised: May 7th, 2017(forked from Monero)
Selecting a pool
There are many pools to choose from, a list is available at electroneropool.com. Mining on a larger pool could mean more frequent payouts, but mining on a smaller pool helps to keep the network decentralized.
Selecting a CPU miner
Just like pools, there are a lot of miners to choose from. The one that you should pick depends on the hardware you want to mine on. This guide will only use a CPU miner, and will be using xmr-stak-cpu. Alternatives include wolf's CPUMiner and sgminer-gm. However, their configuration is slightly different and will not be covered in this guide.
For Windows Systems
If you are using a Windows system, the developer of xmr-stak-cpu provides binaries to download on the GitHub release page.
Download xmr-stak-cpu-win64.zip and extract it somewhere you'll be able to
find it again.
For Other Operating Systems
If you're not using Windows, you will have to compile xmr-stak-cpu for yourself, luckily this isn't as hard as it sounds. Before you can compile the miner, you will need to install some of its prerequisites.
For Debian-based distros:
sudo apt-get install libmicrohttpd-dev libssl-dev cmake build-essential
For Red Hat based distros:
sudo yum install openssl-devel cmake gcc-c++ libmicrohttpd-devel
Following this, you just need to use cmake to generate the build files, run make and copy the config file:
mkdir build-$(gcc -dumpmachine)
cd $_
cmake ../
make -j$(nproc)
cp ../config.txt bin/
cd bin
Don't celebrate just yet, as the miner needs to be configured. Running the miner now should give you a block of text to copy and paste:
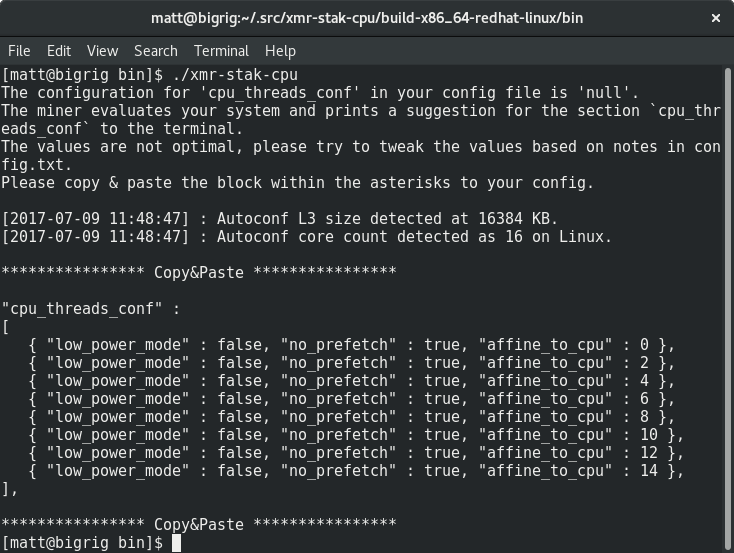
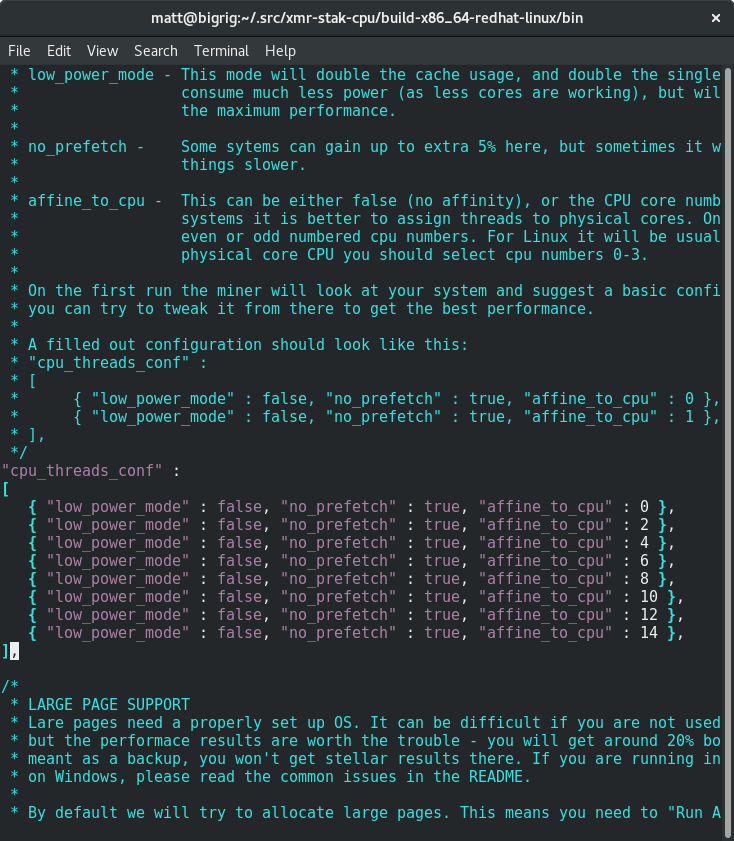
Open config.txt and replace the two "cpu_threads_conf" lines with the text
you just copied. It should look something like this afterwards:
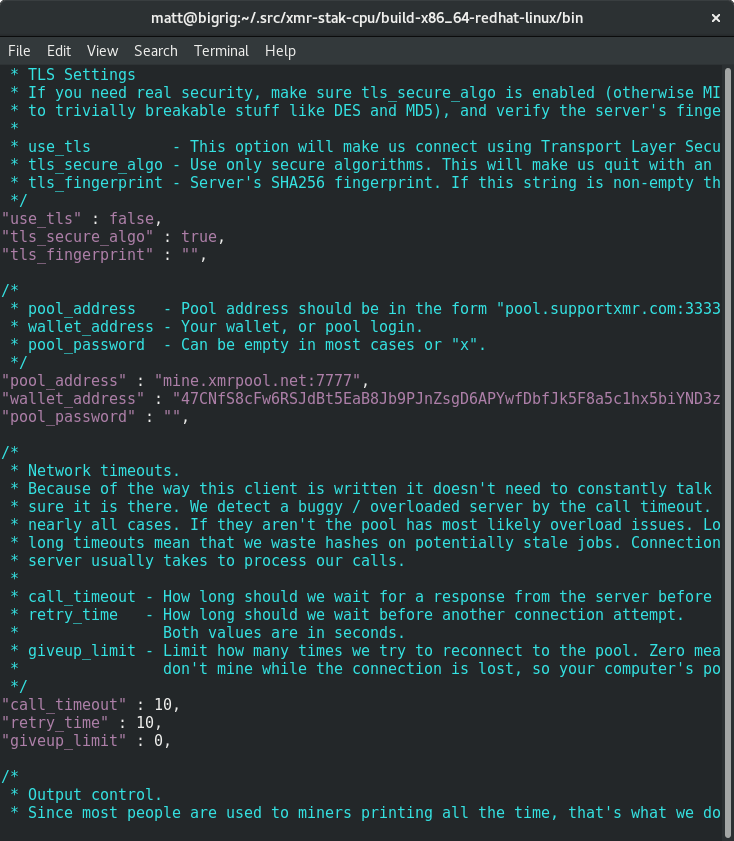
Scroll down in the file until you see the lines containing "pool_address".
Replace the contents of the second set of quotes with the address and port of
the pool you chose earlier. You can find this information on the pool's website.
Put your wallet address between the quotes on the wallet address. You may leave the password blank unless the pool specifies otherwise.
After this, your config should look something like this:
Running the miner
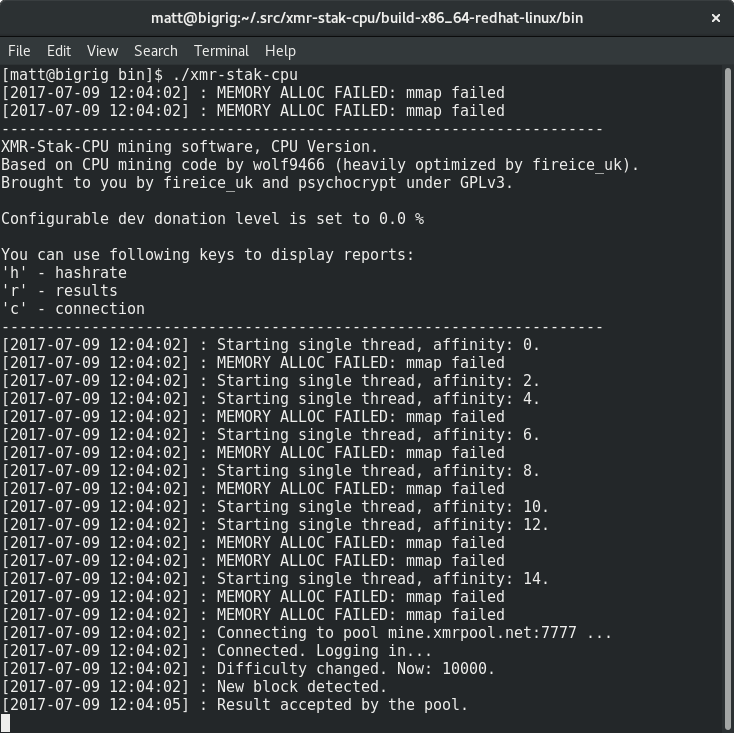
Save the config file and run the miner!
Some pools allow you to monitor your hashrate by pasting your address into their
website. You can also monitor your hashrate by pressing the h key.
Tuning the miner
You might see nasty messages like this:
[2017-07-09 12:04:02] : MEMORY ALLOC FAILED: mmap failed
This means that you can get around a 20% hashrate boost by enabling large pages.
Large pages on Linux
Firstly stop the miner (if it's running), run the following commands to enable large pages and then start the miner as root:
sudo sysctl -w vm.nr_hugepages=128
sudo ./xmr-stak-cpu
Large pages on Windows
Taken from config.txt:
By default we will try to allocate large pages. This means you need to "Run As Administrator" on Windows You need to edit your system's group policies to enable locking large pages. Here are the steps from MSDN
- On the Start menu, click Run. In the Open box, type gpedit.msc.
- On the Local Group Policy Editor console, expand Computer Configuration, and then expand Windows Settings.
- Expand Security Settings, and then expand Local Policies.
- Select the User Rights Assignment folder.
- The policies will be displayed in the details pane.
- In the pane, double-click Lock pages in memory.
- In the Local Security Setting – Lock pages in memory dialog box, click Add User or Group.
- In the Select Users, Service Accounts, or Groups dialog box, add an account that you will run the miner on
- Reboot for change to take effect.